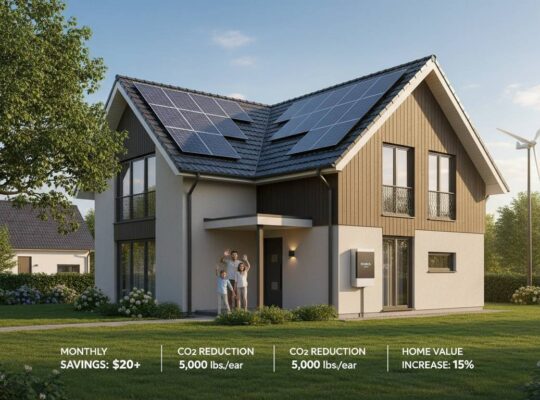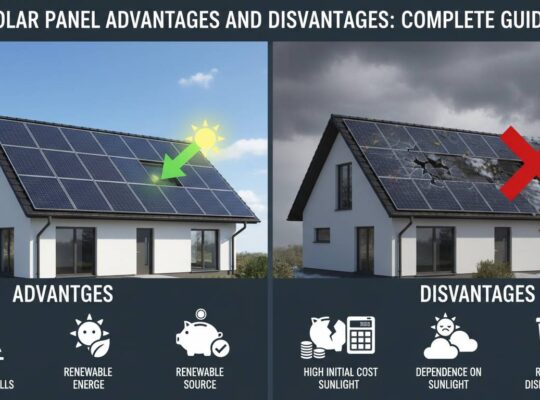
Installing solar panels on your home can reduce your electricity bills by 50-80%, increase your property value by approximately 4.1%, and contribute to environmental sustainability. This comprehensive guide walks you through every step of the residential solar installation process, from initial assessment to flipping the switch on your new clean energy system.
Understanding Your Home’s Solar Potential
Before investing in a solar power system, you need to evaluate whether your home is suitable for solar energy production. Several factors determine whether your property can effectively generate solar power.
Solar irradiance refers to the amount of solar energy your location receives. The southwestern United States, including states like Arizona, California, Nevada, and New Mexico, receives the highest solar irradiance, averaging 5-6 kWh per square meter daily. However, even northeastern states like Massachusetts and New York receive sufficient solar energy for viable residential systems, averaging 3-4 kWh per square meter daily.
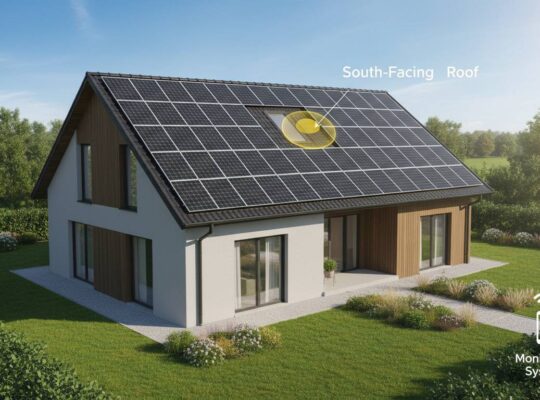
Roof orientation and pitch significantly impact solar panel efficiency. South-facing roofs in the Northern Hemisphere capture the maximum sunlight throughout the day. East and west-facing roofs can still work well but may produce 15-25% less energy. The ideal roof pitch typically matches your latitude, though panels can be mounted at various angles using racking systems.
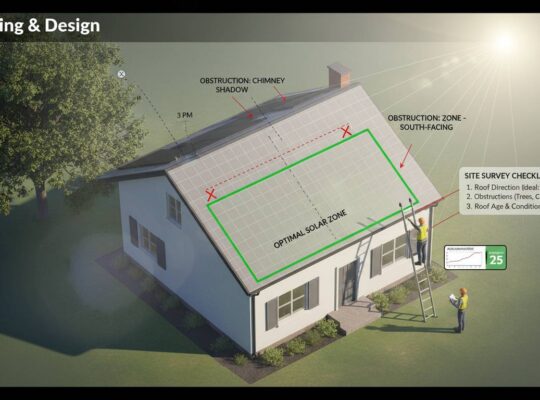
Shading is perhaps the most critical factor. Trees, neighboring buildings, chimneys, or other obstructions that cast shadows on your roof can reduce solar panel output by 20-90%. A professional solar installer will use tools like solar path calculators to assess shading at different times of day and seasons.
Roof condition matters because solar panels have a 25-30 year lifespan. If your roof needs replacement within the next decade, complete that project before installing solar panels. Most manufacturers void warranties if panels are installed on roofs older than 10-15 years.
Evaluating Your Energy Needs
Understanding your household’s electricity consumption is essential for sizing your solar system correctly. This calculation ensures you generate enough power to meet your needs without significant overproduction.
Step 1: Review your electricity bills. Gather 12 months of utility bills to understand your annual energy consumption pattern. Look for the total kilowatt-hours (kWh) consumed each month—residential electricity usage in the United States averages approximately 886 kWh per month for typical households, according to the U.S. Energy Information Administration.
Step 2: Calculate peak usage. Identify your highest monthly usage, typically during summer months when air conditioning runs continuously. Your solar system should at minimum cover these peak periods.
Step 3: Account for future changes. Consider planned changes like electric vehicle purchases, home additions, or switching from gas to electric appliances. Undersizing your system now may require expensive upgrades later.
Step 4: Determine system size. A typical residential solar panel produces 300-400 watts. To calculate your needed system size: divide your annual kWh consumption by your location’s production factor (typically 1,200-1,600 for most U.S. locations). For example, a home consuming 10,000 kWh annually in a moderate sun area would need approximately a 6-8 kW system (10,000 ÷ 1,400 ≈ 7.1 kW).
Choosing the Right Solar Equipment
The solar industry offers numerous equipment options, each with different performance characteristics, warranties, and price points. Understanding these components helps you make informed decisions.
Solar Panels
Monocrystalline panels offer the highest efficiency ratings, typically 19-22%, meaning they convert more sunlight into electricity per square foot. These panels perform better in low-light conditions and have longer lifespans, often exceeding 25 years. However, they come with higher price tags, averaging $0.20-$0.35 per watt more than polycrystalline options.
Polycrystalline panels are more affordable but slightly less efficient, averaging 15-17%. They work well for homes with ample roof space where maximizing efficiency per dollar matters more than efficiency per square foot.
Thin-film panels are the least efficient at 10-13% but offer advantages in certain applications. They’re lighter, more flexible, and perform better in high-temperature environments. Many homeowners associations prefer them for their sleek, uniform appearance.
Bifacial panels represent newer technology that captures sunlight from both sides, potentially increasing energy production by 5-15%. These premium panels cost more but may offer better long-term value in the right installations.
Inverters
The inverter converts the direct current (DC) electricity produced by panels into alternating current (AC) used by your home’s electrical system.
String inverters connect all panels in series, representing the most cost-effective option. They work well for installations without shading issues and typically last 10-15 years.
Microinverters install on each individual panel, maximizing energy production in partial shade and enabling panel-level monitoring. They cost more upfront but often provide better long-term performance in challenging conditions.
Power optimizers combine string inverter economics with microinverter benefits. They install at each panel but use a central inverter, offering a middle-ground solution.
Racking and Mounting
Quality mounting systems ensure panels remain secure for decades. Look for products with comprehensive warranties and certifications for wind and snow loads relevant to your climate zone. Roof-mounted systems remain most common, but ground-mounted options work for properties with ample land and less ideal roof conditions.
Financial Considerations and Incentives
Understanding the financial landscape helps you budget appropriately and maximize savings. Multiple incentive programs can significantly reduce your net investment.
Federal Tax Credit
The federal Investment Tax Credit (ITC) allows you to deduct 30% of your solar system costs from federal taxes. This includes panels, inverters, mounting equipment, and installation labor. The credit applies to both owned systems and financed purchases. Note that lease and power purchase agreement (PPA) arrangements may qualify differently—consult a tax professional.
State and Local Incentives
State incentives vary dramatically. California offers the Self-Generation Incentive Program providing $0.20-$0.35 per watt for residential systems. Massachusetts provides incentives through the Solar Massachusetts Renewable Target (SMART) program. Many states also offer sales tax exemptions on solar equipment and property tax exemptions for solar-added home value.
Utility companies frequently offer rebates, sometimes ranging from $0.10-$0.50 per watt. Check with your local utility before purchasing to identify available programs.
Net Metering
Net metering policies allow you to sell excess solar electricity back to the grid. When your panels produce more than you consume, your meter runs backward, crediting you at the retail electricity rate. Most states mandate net metering, though policies vary in compensation rates and rollover provisions.
Time-of-use rate structures may affect your net metering value—producing electricity during peak afternoon hours when rates are highest maximizes your savings.
Financing Options
Cash purchase provides the best long-term return, typically achieving payback in 6-10 years with 20+ years of free electricity afterward.
Solar loans offer zero-money-down options with monthly payments often lower than previous electricity bills. PACE (Property Assessed Clean Energy) financing attaches the loan to your property tax assessment.
Leases require no upfront costs but provide lower overall savings than ownership. PPAs let you purchase the electricity your system produces without owning the equipment.
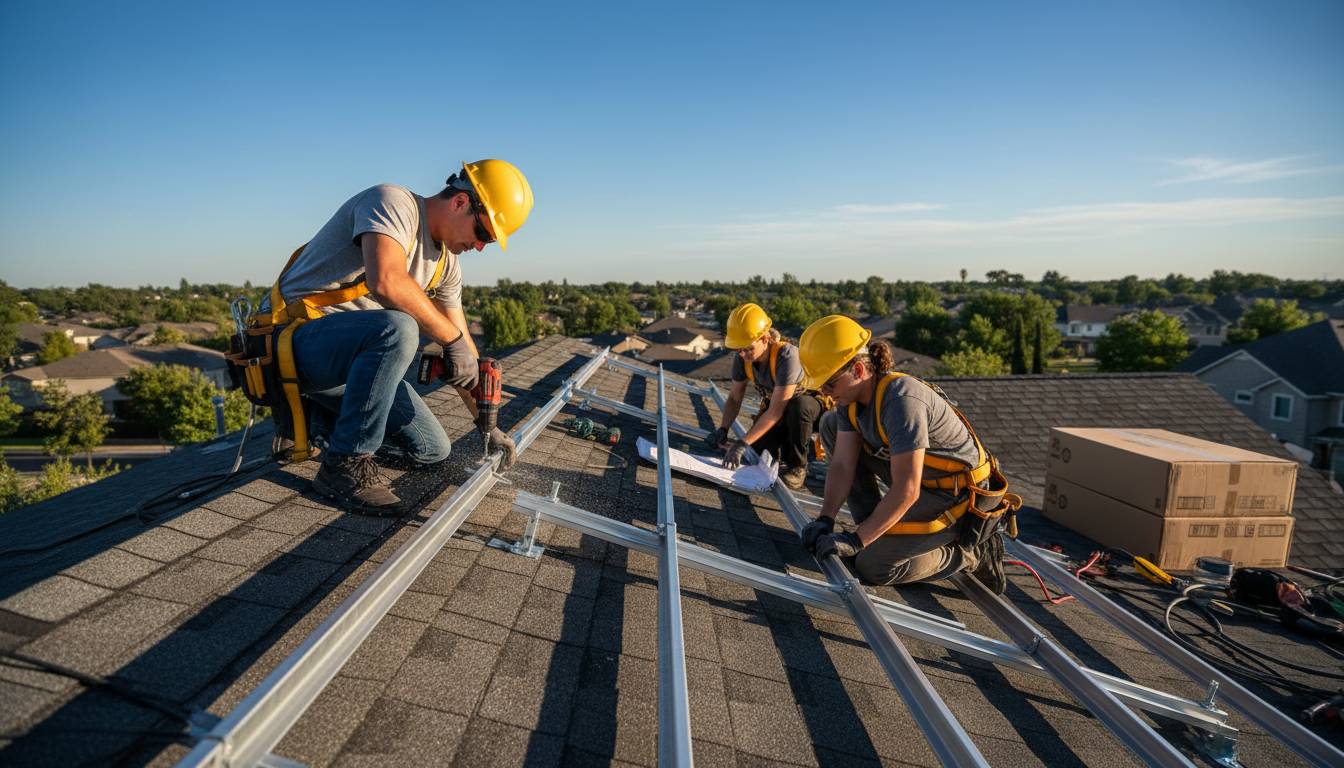
The Installation Process
Professional installation typically takes 1-3 days depending on system size and roof complexity. Understanding the process helps you prepare and ensures quality work.
Pre-Installation Preparation
Engineering site visit occurs before installation day. Engineers assess roof structure, verify electrical panel capacity, and confirm system design. They may need to upgrade your electrical panel to accommodate solar.
Permits must be pulled before work begins. Your installer typically handles this, but understand that permit approval may take 2-4 weeks in some jurisdictions.
Homeowner association approval may be required. Some states have passed solar access laws limiting HOA restrictions, but submission and approval still takes time.
Installation Day
Roof preparation involves cleaning the installation area and marking panel positions. Installers verify rafters can support the racking system’s weight.
Racking installation secures the mounting rails to your roof structure, not just the roofing material. Proper flashing and sealing prevent leaks.
Panel mounting secures panels to the racking system using manufacturer-specified clamps and hardware. Installers ensure proper spacing for airflow and maintenance access.
Electrical work includes running wiring through the roof, connecting panels in series or parallel configurations, and installing the inverter and monitoring system.
Post-Installation
Inspections are required before system activation. A city inspector verifies electrical work meets code, while another confirms proper roof flashing and structural attachment.
Utility approval involves your electric company inspecting the installation, installing a bidirectional meter, and approving grid connection. This process typically takes 1-4 weeks.
Connecting to the Grid
Grid connection enables net metering and provides backup power when your panels aren’t producing. Understanding this connection ensures safe, compliant operation.
Interconnection agreement formalizes your relationship with the utility, establishing metering arrangements, net metering terms, and safety protocols.
Smart meters record electricity flowing in both directions, enabling accurate net metering billing. Your utility typically provides these at no additional cost.
Rapid shutdown compliance is required by the National Electrical Code. Modern inverters include rapid shutdown capabilities that allow emergency responders to safely disable the system.
Anti-islanding protection ensures your solar system automatically shuts down during grid outages, protecting utility workers from unexpected power sources.
Maintenance and Monitoring
Solar systems require minimal maintenance, but regular attention extends performance and catches problems early.
Routine Maintenance
Panel cleaning removes dust, pollen, and debris that can reduce output by 5-15%. In most regions, annual cleaning suffices, though dusty environments or homes near construction may need more frequent attention. Clean panels with water and a soft brush—avoid pressure washers that can damage components.
System monitoring tracks daily, weekly, and monthly energy production. Most systems include smartphone apps displaying real-time output. A sudden production drop of 20% or more indicates potential problems requiring investigation.
Annual inspection involves a professional checking electrical connections, mounting hardware, and inverter performance. This takes 1-2 hours and costs $150-$300.
Troubleshooting
Production drops may result from inverter errors, panel damage, or shading changes (new construction, tree growth). Review monitoring data to identify when the drop occurred and investigate accordingly.
Inverter messages vary by manufacturer. Most display error codes for grid connection issues, ground faults, or component failures. Reference your inverter manual or contact your installer for interpretation.
Warning signs include unusual sounds from the inverter, burning smells, or visible damage to panels or wiring. Disconnect the system and contact a professional immediately for safety.
Common Mistakes to Avoid
Learning from others’ errors helps you sidestep costly problems.
Mistake 1: Choosing the lowest bidder. Price matters, but the cheapest quote often indicates subpar equipment, inexperienced installers, or hidden costs. Verify installer certifications, check references, and ensure equipment meets industry standards.
Mistake 2: Ignoring system sizing. Undersized systems fail to significantly reduce bills. Oversized systems may not qualify for optimal net metering rates. Accurate sizing based on your actual consumption prevents both scenarios.
Mistake 3: Overlooking shading analysis. A professional shading analysis using tools like Solar Pathfinder or Suneye devices identifies problem areas. Installers who skip this step may deliver underperforming systems.
Mistake 4: Not reading warranty terms. Solar panel warranties typically include 25-30 year power output guarantees and 10-12 year product warranties. Inverter warranties range from 5-15 years. Understand what’s covered and what’s not before purchasing.
Mistake 5: Failing to compare quotes. Request proposals from at least three installers. Ensure quotes include identical system sizes and equipment specifications for accurate comparison.
Frequently Asked Questions
How long does it take to install solar panels at home?
The physical installation typically takes 1-3 days for residential systems. However, the entire process—from initial consultation to grid connection—generally takes 2-4 months. This includes site assessment, system design, permitting (2-8 weeks), installation, inspections, and utility approval.
Will solar panels work during cloudy days?
Yes, solar panels still generate electricity on cloudy days, though at reduced output—typically 10-25% of their rated capacity. Modern panels capture ambient light, and grid connection ensures you have power when production is low. Areas with frequent cloud cover can still benefit from solar when systems are appropriately sized.
What happens to my solar system during a power outage?
Grid-tied solar systems automatically shut down during outages for safety—this is called anti-island protection. This prevents your panels from sending electricity into lines that utility workers expect to be de-energized. To maintain power during outages, you need a battery storage system with proper backup capabilities.
How much money will I save with solar panels?
Savings depend on your electricity rates, system size, and local policies. The average American household saves $1,500-$2,500 annually with solar, totaling $30,000-$60,000 over the system’s 25-year lifespan. Factors affecting savings include net metering rates, system production, and electricity rate inflation.
Do solar panels increase my home’s value?
Yes, studies indicate that homes with solar panels sell for approximately 4.1% more than homes without them, according to Zillow research. This value increase typically exceeds the net cost of the system, making solar a positive investment when selling your home.
What is the lifespan of a residential solar system?
Quality solar panels maintain 80-90% of their original output after 25 years. Inverters typically last 10-15 years and require replacement. Most manufacturers guarantee panel performance at 80-85% after 25 years, making systems viable for 30+ years with proper maintenance.