Installing solar panels yourself can reduce installation costs by 50-70% while giving you complete control over your energy future. This guide walks you through every step of a DIY solar panel installation, from initial planning to flipping the switch on your new renewable energy system.
Key Insights
- The average U.S. household can save $20,000-$30,000 over 25 years by installing solar panels
- DIY solar installations typically cost $2.50-$3.50 per watt compared to $4-$6 per watt for professional installation
- Over 4 million U.S. homes have solar panel systems installed as of 2024, with DIY installations growing 23% year-over-year
Understanding Your Solar Energy Needs
Before purchasing a single panel, you need to determine exactly how much electricity your household consumes and how much of that demand you want solar to meet. This calculation forms the foundation of your entire project and prevents either undersizing your system or overspending on unnecessary capacity.
Calculating Your Energy Consumption
Review your electricity bills from the past 12 months to find your average monthly kilowatt-hour (kWh) consumption. The U.S. Energy Information Administration reports that the average American household uses approximately 886 kWh per month, though this varies significantly by region and household size. Multiply your monthly average by 12 to get your annual consumption, then divide by 12 again to establish your target monthly solar production.
Determining Your Solar Goals
You have three primary options when sizing a residential solar system. A grid-tied system remains connected to your utility company, allowing you to draw power when solar production falls short and sell excess back to the grid through net metering programs. An off-grid system operates independently using battery storage, ideal for remote locations or those seeking complete energy independence. A hybrid system combines grid connection with battery backup, providing resilience during outages while maintaining grid benefits.
Most beginners should start with a grid-tied system because it offers the lowest upfront cost, simplest installation, and immediate financial returns through reduced electricity bills and net metering credits.
Essential Equipment and Components
A complete solar panel system consists of several interconnected components, each serving a critical function in generating, regulating, and delivering electricity to your home.
Solar Panels
Monocrystalline panels offer the highest efficiency ratings, typically 18-22%, making them ideal for roofs with limited space. Polycrystalline panels cost less but efficiency drops to 15-17%, requiring more roof area. Thin-film panels, while flexible and lightweight, degrade faster over time and are rarely recommended for residential applications.
For most residential installations, 400-watt panels represent the current sweet spot between cost, efficiency, and physical size. A typical 6kW system uses 15 panels covering approximately 300 square feet of roof space.
Inverter Systems
The inverter converts the direct current (DC) electricity produced by panels into alternating current (AC) used by your home’s electrical system. String inverters connect all panels in series, offering lower upfront costs but reduced performance when panels experience partial shading. Microinverters attach to each individual panel, maximizing energy production in complex roof layouts but increasing equipment costs by 15-25%.
Power optimizers from manufacturers like SolarEdge provide a middle ground, offering panel-level monitoring and performance optimization at costs between string inverters and microinverters.
Mounting and Racking Equipment
Your mounting system must securely attach panels to your roof while allowing proper drainage and airflow. Rail-based systems offer adjustability and work with most panel brands. Rail-less systems reduce weight and installation time but require specific panel compatibility.
Balance of System Components
| Component | Function | Typical Cost |
|---|---|---|
| Disconnect switch | Safety shutoff for maintenance | $150-$300 |
| Combiner box | Organizes panel wiring | $100-$200 |
| Ground fault protection | Prevents electrical hazards | $50-$150 |
| Conduit and wiring | Routes electrical connections | $200-$400 |
| Monitoring system | Tracks energy production | $100-$300 |
Planning and Preparation
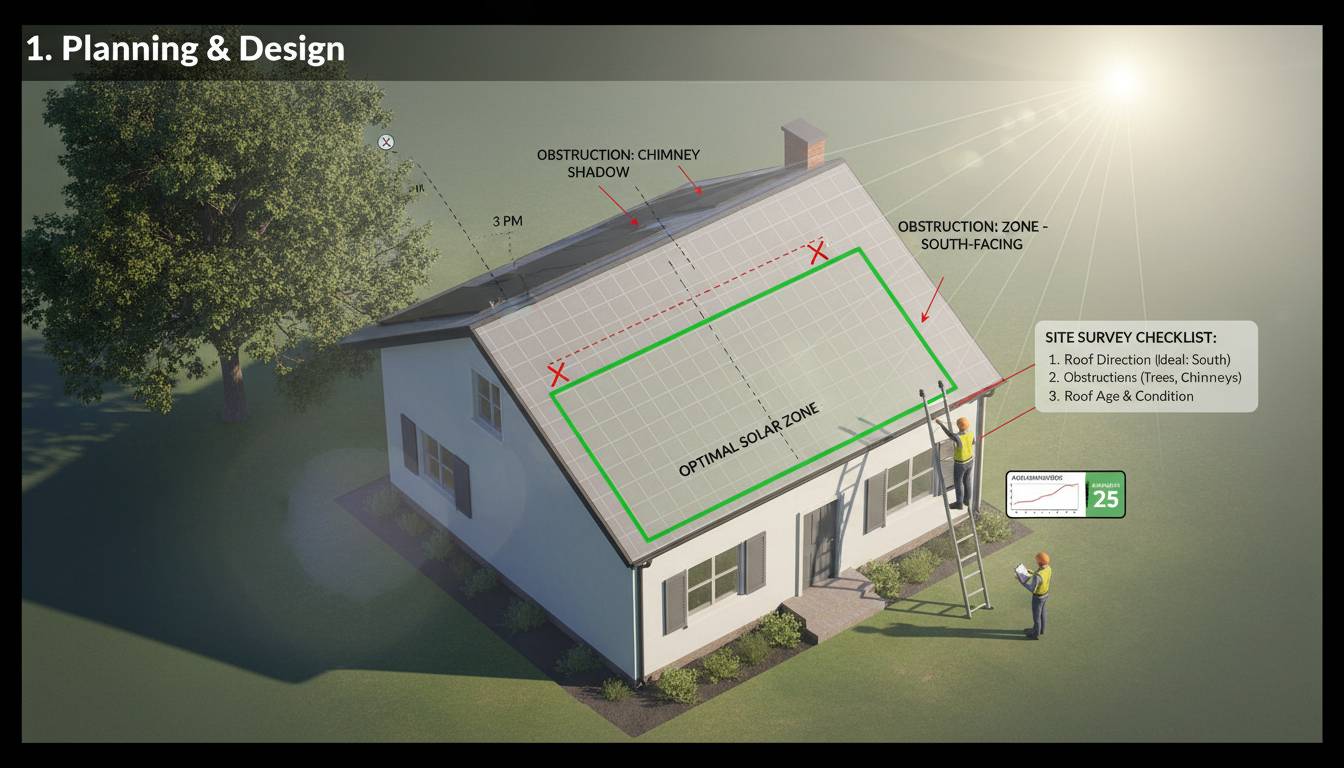
Assessing Your Roof
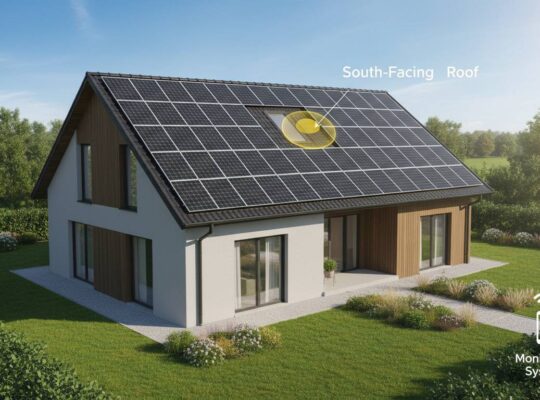
South-facing roofs receive maximum solar exposure in the Northern Hemisphere, with east and west orientations producing 15-25% less energy. Evaluate your roof’s condition before installation—if your roof needs replacement within 10-15 years, complete that project before installing solar.
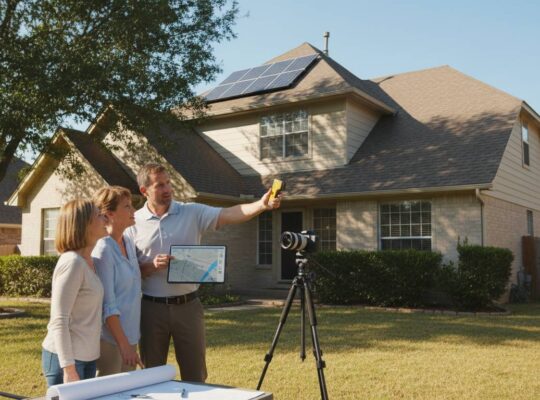
Shade analysis is critical. Even partial shade from trees, chimneys, or HVAC units can dramatically reduce system output. Use tools like Google Project Sunroof or SolarPathfinder to analyze your site’s sun exposure throughout the year.
Understanding Permits and Codes
Most jurisdictions require electrical permits and structural approval for solar installations. The National Electrical Code (NEC) establishes safety standards that your installation must meet. Contact your local building department to obtain permit applications and understand specific requirements.
Utility companies require approval before connecting your system to the grid. This process, called interconnection, typically takes 2-6 weeks and requires your system to meet technical specifications including proper grounding, approved equipment listings, and appropriate inverter settings.
Creating Your System Design
Map your roof dimensions and calculate available square footage. Account for panel spacing around edges, vents, and access pathways. Sketch your proposed panel layout, then use manufacturer specifications to ensure your chosen configuration works within structural load limits.
“The most common DIY mistake is underestimating the complexity of permit applications and interconnection processes. Budget 2-4 months for planning and approvals before installation day.” — Solar Energy Industries Association (SEIA), 2024
Step-by-Step Installation Process
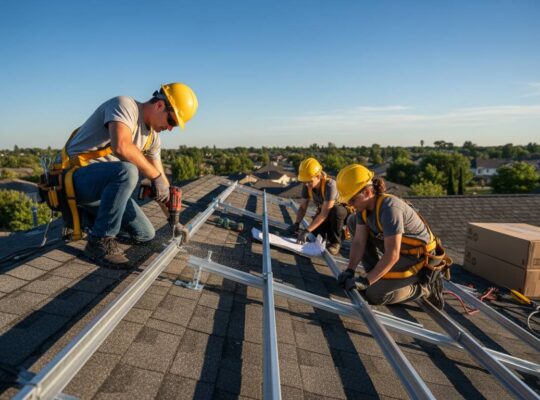
Phase 1: Mounting System Installation
Begin by locating and marking roof rafters using a stud finder. Your mounting rails must attach directly to structural rafters, not just sheathing. Drill pilot holes and secure flashing to prevent water intrusion, then attach rail mounts using stainless steel lag bolts rated for your roof type.
Install rails parallel to each other, ensuring level alignment across the entire array. Most systems require rails positioned 2-4 feet apart, depending on panel dimensions and wind load requirements.
Phase 2: Panel Installation
Panel installation requires at least two people due to the fragility and weight of solar modules. Position each panel on the rails, align mounting holes, and secure with clamps specific to your racking system. Torque specifications typically require 80-120 inch-pounds—overtightening can crack panels while undertightening creates vibration hazards.
Work systematically across your array, maintaining electrical safety by keeping panels covered with opaque material until all connections are complete. Exposed panels generate voltage even in overcast conditions.
Phase 3: Electrical Connections
Run DC wiring from panels to your inverter location using appropriately rated conduit. Maintain proper wire gauge based on current and distance—voltage drop calculations ensure efficiency losses remain below 3%.
Connect panels in series or parallel configurations based on your inverter’s input requirements. Series connections increase voltage while parallel connections increase amperage. Your inverter specifications dictate optimal string configuration.
Electrical Wiring and Connections
String Configuration
For string inverter systems, panels connect in series strings to achieve operating voltages within inverter specifications. A typical 400-watt panel produces approximately 40 volts open-circuit, so 10 panels in series reaches 400 volts—within most string inverter input ranges.
Calculate your string length by dividing your inverter’s maximum input voltage by panel open-circuit voltage, then applying a temperature correction factor. Cold temperatures increase voltage, potentially exceeding inverter limits.
Grounding Requirements
Proper grounding protects your system and home from electrical faults. Connect panel frames, mounting rails, and inverter enclosures to a dedicated grounding electrode using copper wire and appropriate connectors. The NEC requires continuous grounding path with resistance of 25 ohms or less to the earth electrode.
Safety Considerations
Working on roofs presents fall hazards requiring appropriate safety equipment including harnesses, anchor points, and fall protection systems. Electrical work should only be performed by qualified individuals familiar with NEC requirements and local codes.
“Every year, improper DIY solar installations cause house fires and electrocutions. If you’re not comfortable with electrical work, hire a licensed electrician for the wiring portion even if you handle panel mounting yourself.” — Underwriters Laboratories (UL), Safety Advisory 2024
Connecting to the Grid
Interconnection Process
Once your system passes inspection, your utility installs a bidirectional meter that tracks both power consumed and exported. This process typically takes 1-4 weeks after inspection approval.
Net metering policies vary by state and utility, determining how you’re compensated for excess production. Some states require utilities to credit excess at retail electricity rates, while others use avoided-cost rates that may be significantly lower.
Understanding Your Agreement
Review your interconnection agreement carefully. It specifies technical requirements, liability insurance minimums (typically $1-2 million), and your rights and responsibilities as a distributed generator. Some utilities require annual system inspections certified by licensed electricians.
Testing and Troubleshooting
System Activation
With inspections complete and utility approval granted, you’re ready to energize. Turn on your inverter and monitoring system, then verify that production readings match expected output based on current weather conditions. A 6kW system should produce 20-30 kWh daily under clear skies.
Common Installation Issues
| Issue | Symptoms | Solution |
|---|---|---|
| Low voltage | Reduced string output | Check connections, verify string length |
| Ground fault | System shuts down | Inspect wiring damage, test ground paths |
| Inverter fault | Error codes, no production | Consult manual, check DC input specifications |
| Performance variance | Uneven panel output | Clean panels, check for partial shading |
Performance Monitoring
Most inverters include built-in monitoring accessible through smartphone apps or web portals. Establish a baseline during your first month, then track performance against expected production. Significant deviations warrant investigation—often debris accumulation, inverter issues, or undetected shading.
Costs and ROI Analysis
System Pricing Breakdown
A typical 6kW residential system includes:
- Solar panels: $4,800-$7,200
- Inverter: $1,000-$2,500
- Mounting and racking: $800-$1,500
- Electrical components: $500-$1,000
- Permits and inspections: $500-$1,500
Total DIY cost: $7,600-$13,700, compared to $14,000-$24,000 for professional installation.
Return on Investment
The federal Investment Tax Credit (ITC) allows you to deduct 30% of system costs from federal taxes through 2032. Many states offer additional incentives, rebates, or tax credits. Combined with electricity savings, most DIY systems achieve payback in 5-8 years depending on local electricity rates and system production.
With 25-year panel warranties and inverter replacements typically needed after 10-15 years, your system generates 15+ years of free electricity after payback.
Frequently Asked Questions
How long does a DIY solar panel installation take?
A motivated homeowner with helper assistance can complete a typical residential installation in 2-4 weekends. The permitting and approval process typically takes 2-4 months before installation begins, so plan accordingly.
Can I install solar panels myself, or do I need an electrician?
You can perform the physical installation if you’re comfortable with construction and working at heights. However, electrical connections should be performed by or inspected by a licensed electrician to ensure safety and code compliance. Many homeowners mount panels themselves while hiring electricians for wiring.
Do solar panels work on cloudy days?
Yes, panels still generate electricity in diffused light, though output decreases to 10-25% of rated capacity. Your system will still produce meaningful energy on cloudy days, just significantly less than sunny conditions.
What happens if my roof needs repair after installing solar panels?
Solar panels must be removed before roof repairs, then reinstalled afterward. This process costs $500-$1,500 depending on system size. Plan roof repairs before installation if your roof is near end-of-life.
Will solar panels increase my home’s resale value?
Yes, studies by Zillow and Lawrence Berkeley National Laboratory found homes with solar panels sell for approximately 4.1% more than homes without, though exact premiums vary by market and system size.
How long do solar panels last?
Most manufacturers warrant panels for 25-30 years at 80-85% of rated output. Panels continue functioning beyond warranty periods, though degradation gradually reduces production. Inverters typically require replacement after 10-15 years.